WiFi locations are used to display different login pages and themes on the user device, depending on which access point the customer is trying to access the Internet.
Each location is defined with an IP range of the Access Points associated. It has a name according to a physical location, like Lobby, Rooms, Main building, Reseller X, Operator Area Y.
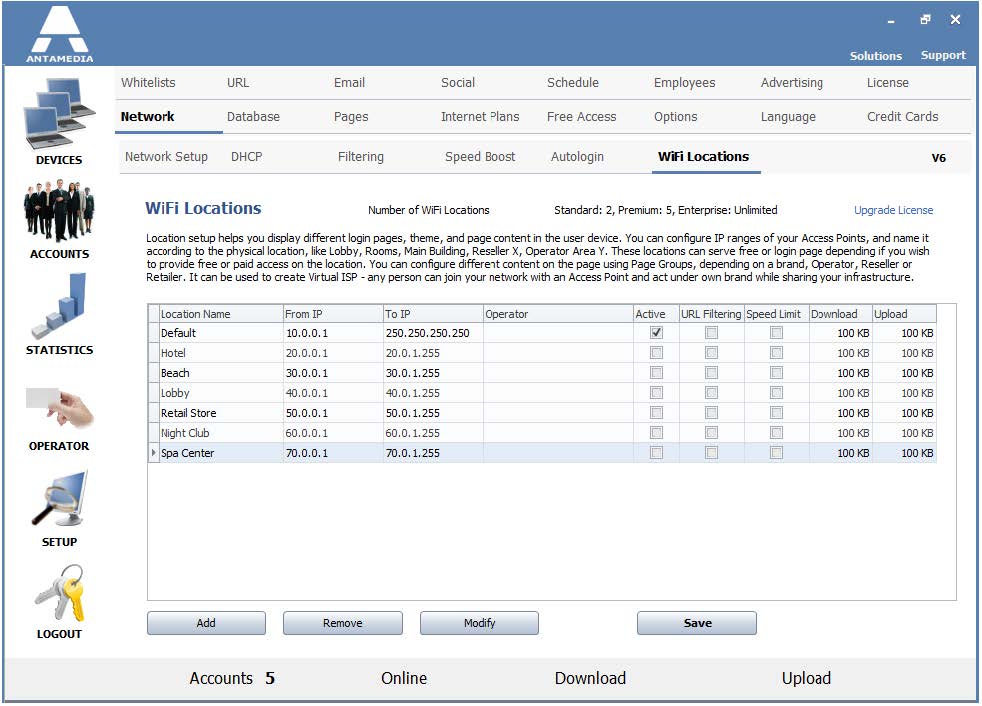
Locations can be configured to display free access or login page, depending on if you wish to provide free or paid access.
For example, in a hotel lobby, you can provide a free service, while in the rooms you can offer only paid service.
You can configure different content on the pages depending on a brand, Reseller, Operator, or Retailer.
It can be used to create Virtual ISP – any person can join your network with an Access Point and act under own brand while sharing your infrastructure.
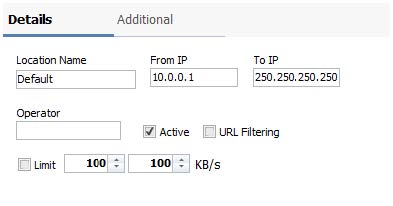
To create a new location go to HotSpot Setup – WiFi Locations page. Select any of locations in the list to get Details tab.
From Details tab configure Location Name, starting and ending IP addresses.
Operator’s name for the location, URL Filtering, and Limit is optional.
 From Additional tab configure Login message, Welcome message, different Redirect URL after login, activate Quick Survey, change Logo and Background for the location.
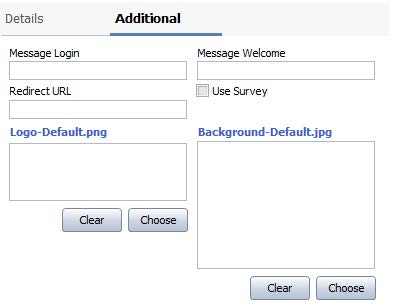 Click Add and Save button to apply changes.
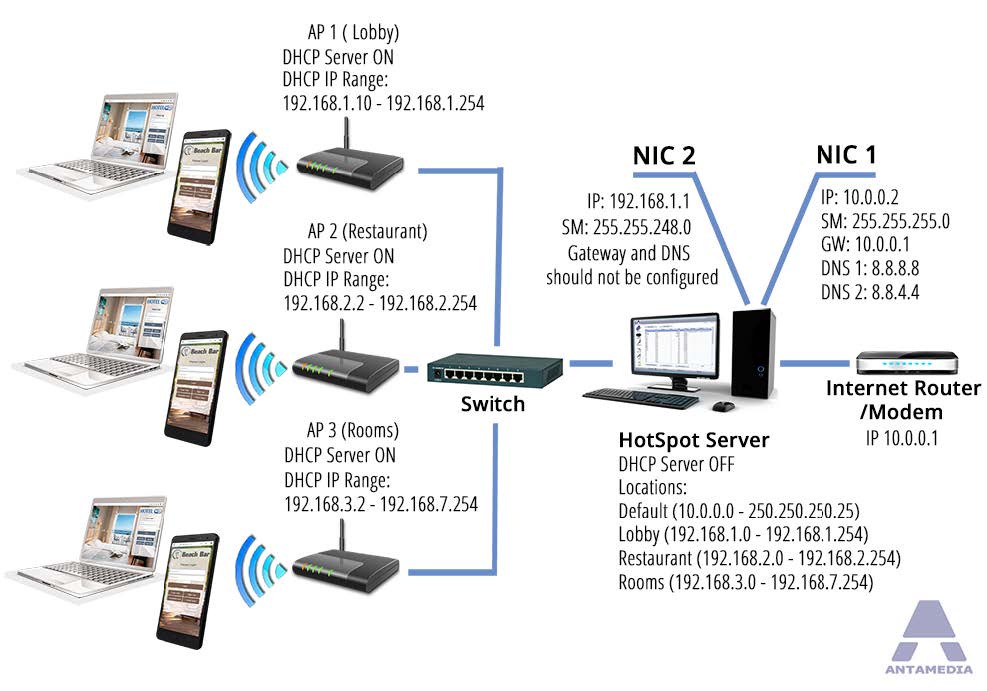
WiFi Locations feature can be used within the local network (LAN) where HotSpot server resides. The HotSpot can be set up so that each location (an Access Point or group of them) displays login page with different settings (theme, free access/paid, etc.).
This functionality requires that all Access Points support DHCP server feature.
The following example will explain the typical setup and give you an idea of how to configure locations in a Hotel.
Hotel’s Hotspot server will be configured to display different type of login pages in the lobby, restaurant, and rooms.
In the lobby, the Hotspot login page should contain only ticket login form.
The restaurant will provide free access with a predefined keyword. In the rooms, guests will get a page with an account login form and sign-up link.
Alternatively, it can be switched to PMS Hotel login form, where a guest may authenticate using a room number and a guest name (PMS Interface module is required in this case).
This scenario can be configured with the following steps:
1. Hotspot network needs to be designed using the same principles as an example network diagram
2. IP range for each access point (location) has to be configured on HotSpot Setup – WiFi Locations page
3. An access point on each location has to be set to act as DHCP server, with the IP pool range configured to match the IP range configured for that location in Hotspot.
4. Login page settings should be configured for each location, this is done from HotSpot Setup – Pages – Default page screen:
4a. Select the location for which you want to define page rules
4b. Choose type and subtype of the default page.
4c. Select Sign Up method
4d. Configure Theme settings
4e. Click Save button
After the procedure is completed, users in each location should get a different login page, according to configured settings.
Software must be connected over the IP address, we do not support VLANs.