Here are detailed step by step instructions on how to set gateway computer network adapters to work with Bandwidth Manager NAT and support the use of DNS Web filter.
Setup of static IP addresses on the gateway computer
1. The static IP address is configured on NIC1, the network card connected to the Internet router/modem.
· It is recommended to set the same IP address that is already assigned dynamically by the router.
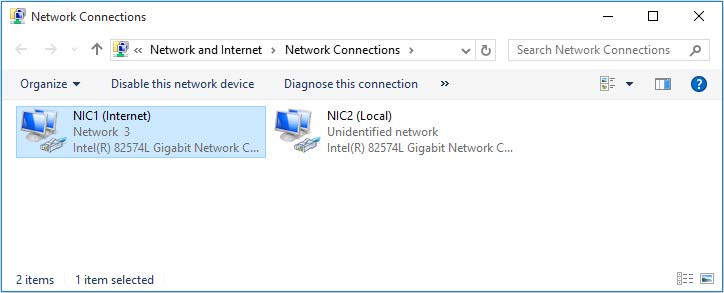
· To see which IP NIC1 has currently assigned, go to Windows Control Panel – Network and Sharing Center screen.
· Click on the Change adapter settings link and double click on the NIC1 (Internet) network adapter.
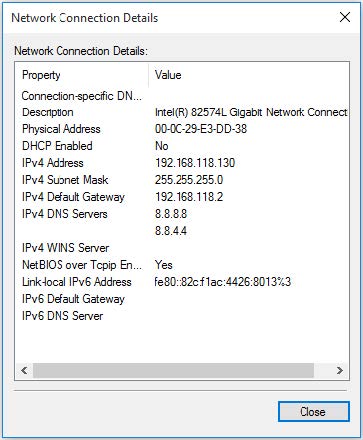
 · From General tab press on Details button.
 Here you will see all current network connection details that you need to set as a static IP address.
 · Go to the Windows Control Panel – Network and Sharing Center screen.
· Click on Change adapter settings link.
· Right-click on NIC1 (Internet) and select Properties from the menu.
 · Select Internet Protocol Version 4 (TCP/IPv4) and click the Properties button.
 · Click Use the following IP address radio button and enter details that you get from ipconfig previously.
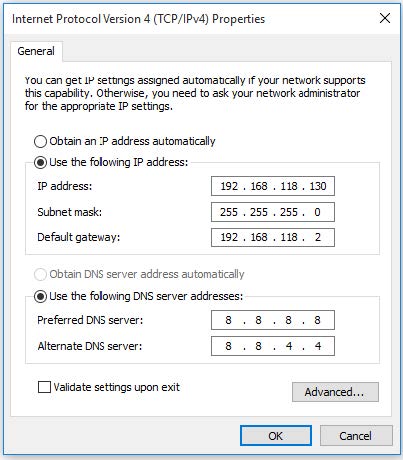 · Enter IP address (e.g. 192.168.118.130)
· Click in Subnet Mask field, the value will be set automatically based on the IP address, be sure that is same as in Network Connection Details
· Enter the IP address of the default gateway (IP of the Internet router).
· Enter DNS addresses, it is recommended to use DNS addresses of your ISP or public DNS service such as Google (8.8.8.8, 8.8.4.4).
· Click OK and close all dialog windows.
2. The static IP address should be set for NIC2, the network card used for communication with the client computers.
· To set the static IP address for NIC2, go to Windows Control Panel – Network and Sharing Center screen
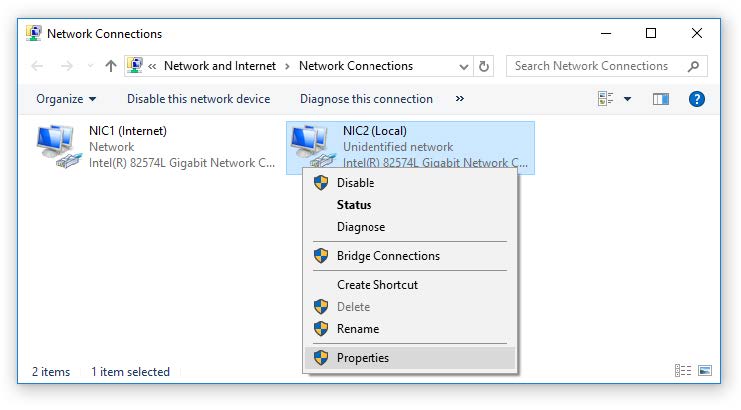
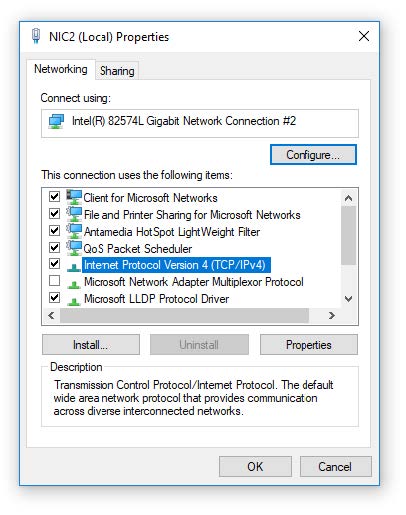
· Click on Change adapter settings link and make right-click on NIC2 (Local) and select Properties from the menu.
 · Select Internet Protocol Version 4 (TCP/IPv4) and click the Properties button.
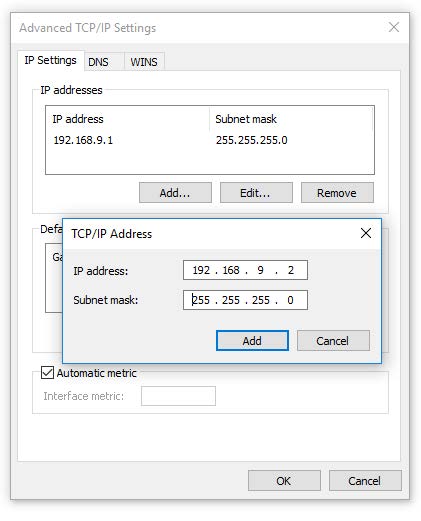
 · Click on Use the following IP address and set the IP address (e.g. 192.168.9.1) and Subnet mask (e.g. 255.255.255.0) but not Default gateway IP. Then press on Advanced … button.
 · From Advanced tab press on Add.. and add virtual IP address needed for DNS WEB Filter. Be sure that it is in same IP range with IP address and with the same Default gateway (e.g. 192.168.9.2) and Subnet mask (e.g. 255.255.255.0)
 Setup of static IP addresses on the local network
· To set static IP addresses for local network computers:
set the IP address in the same IP range with NIC2 (Local) (e.g. 192.168.9.2-192.168.9.253);
same Subnet mask (e.g.255.255.255.0);
Default Gateway is IP of the NIC2 (Local) network adapter (e.g.192.168.9.1);
Preferred DNS is NIC2 (Local) IP address (e.g.192.168.9.1);
As Alternate DNS use a virtual IP address that you have added to NIC2 (Local) adapter (e.g. 192.168.9.2)
Setup of dynamic IP addresses on the local network
· On all client computers go to Network Connection Properties – Internet Protocol Version 4 (TCP/IPv4) Properties.
Select the radio button for Obtain an IP address automatically and Obtain DNS server automatically. On the gateway computer be sure that in DHCP Server application you configure the following:
IP pool is in range of NIC2 (Local) (e.g 192.168.9.3-192.168.9.253)
Subnet mask should be same as on NIC2 (Local) (e.g. 255.255.255.0)
Router IP is same as NIC2 (Local) address (e.g. 192.168.9.1)
Preferred DNS is NIC2 (Local) IP address (e.g.192.168.9.1)
Alternate DNS is a virtual IP address that you have added to NIC2 (Local) adapter (e.g. 192.168.9.2)
· Note: Internet modem/router cannot be used as a DHCP server for your local network clients. The DHCP server must be configured only for the local network.
Windows 7, Windows 8.1 and Windows 10 DHCP Server can not provide more than 253 IP addresses for the local network.
If you want to use more than 253 addresses you can set it from Windows Server 2008, Windows Server 2012 or Windows Server 2016 DHCP Server role. Also, you will need to set subnet mask which will give you this ability.
Be sure that you prepare all network devices on the local network to use the same subnet mask.
Bellow are some of examples:
IP range (network – broadcast) Subnet Mask IP Quantity
192.168.137.0 – 192.168.137.255 255.255.255.0 256
192.168.136.0 – 192.168.137.255 255.255.254.0 512
192.168.136.0 – 192.168.139.255 255.255.252.0 1024
192.168.136.0 – 192.168.143.255 255.255.248.0 2048
192.168.128.0 – 192.168.143.255 255.255.240.0 4096
192.168.128.0 – 192.168.159.255 255.255.224.0 8192
192.168.128.0 – 192.168.191.255 255.255.192.0 16384
192.168.128.0 – 192.168.255.255 255.255.128.0 32768
192.168.0.0 – 192.168.255.255 255.255.0.0 65536