This section allows you to define all the products and services that you provide to your customers and to categorize them according to your business needs.
It is located on the Internet Cafe Server Setup – POS – Item – General tab.
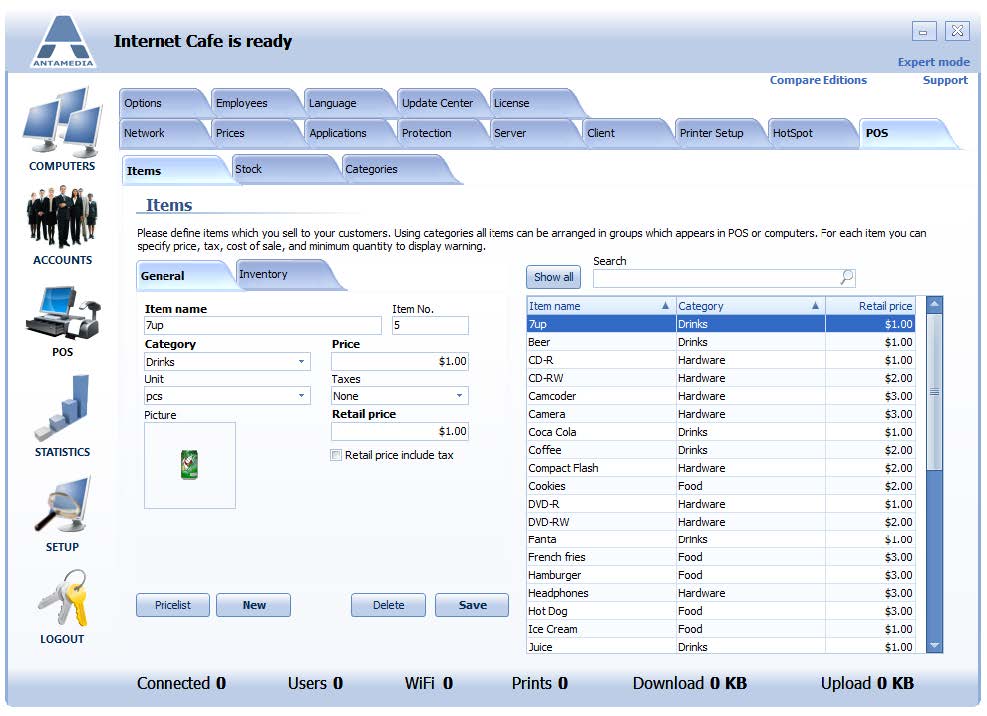
To add a new item, please follow these steps:
1. Enter Item Name
2. (Optional) Enter Item No.
3. Select Category for an item from the drop-down menu
4. Choose how the item is to be retailed from the Unit drop-down menu
5. Set Price per item
6. Choose which Taxes will be applied to an item price from the drop-down menu
7. Define Retail Price
8. Set Retail Price to include TAX or not
9. Add item Picture (right-click on a picture box, single left click on load, search for the photo in the directory and upload)
10. Click the New button to save the item
You can search for previously added items by typing the item name in the search field on the right of the screen or by clicking on Show All and scrolling down the list.
Double left-clicking on any of the items will allow you to edit the product.
You can also print out a complete price list of all items added by a single left-clicking on the Pricelist button.