The Dashboard is the main control center for managing Cloud Station, with quick access to Stations, POS, and Bills from the top toolbar. It’s designed for fast daily work, open what you need in one click, complete sales, and review transactions without switching screens.
With a responsive, dark-themed layout, it provides a visual overview of each device’s current state – online, idle, or error.
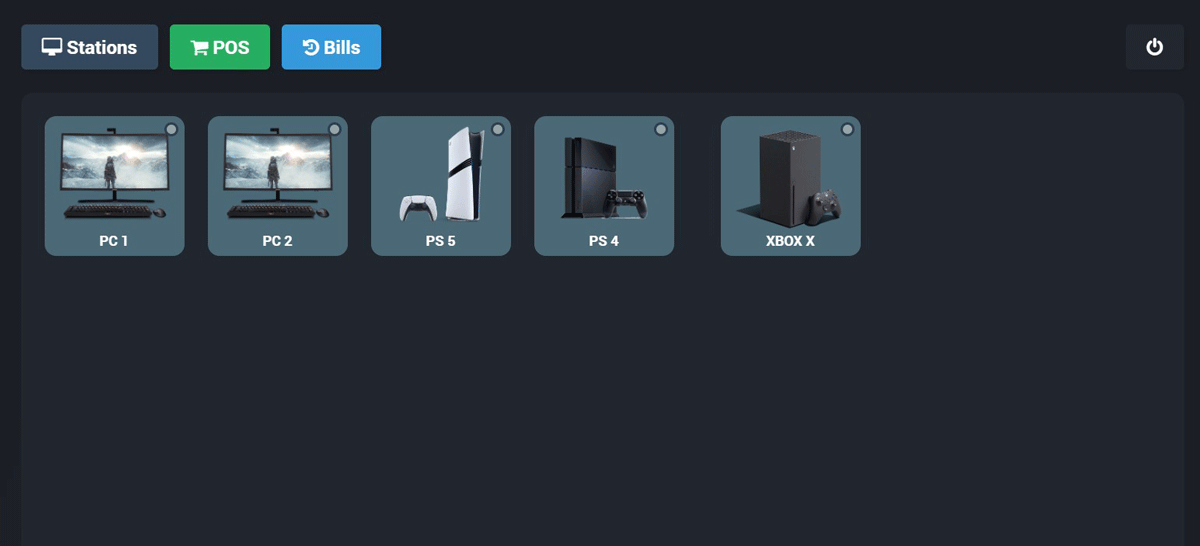
The Stations tab opens the stations grid. This is the live display of all stations you have created in the system (for example, PC, PlayStation, Xbox…).
Each tile gives staff a quick way to select a station and work with it immediately, so devices can be managed directly from one place.
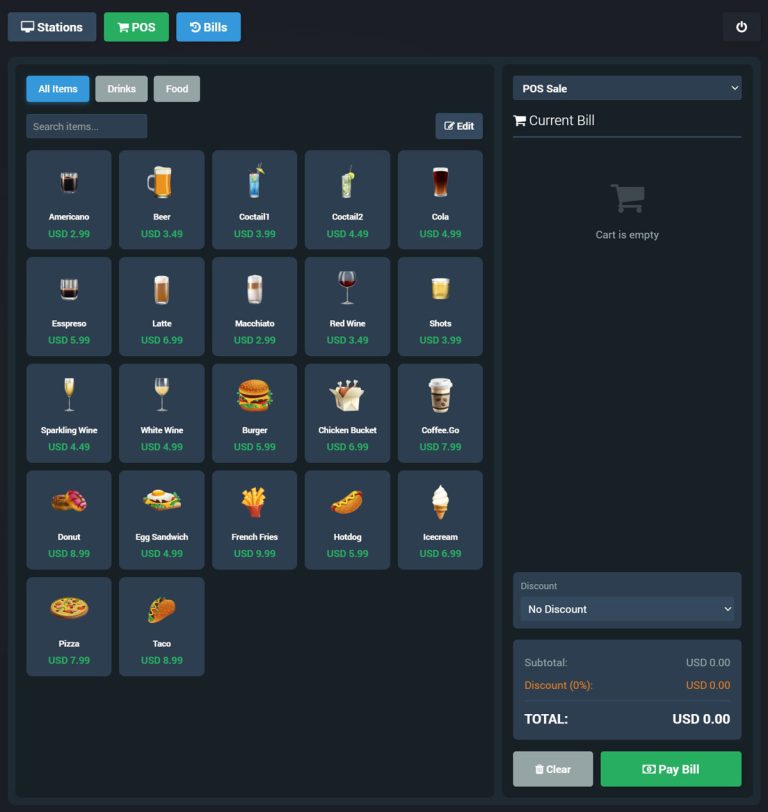
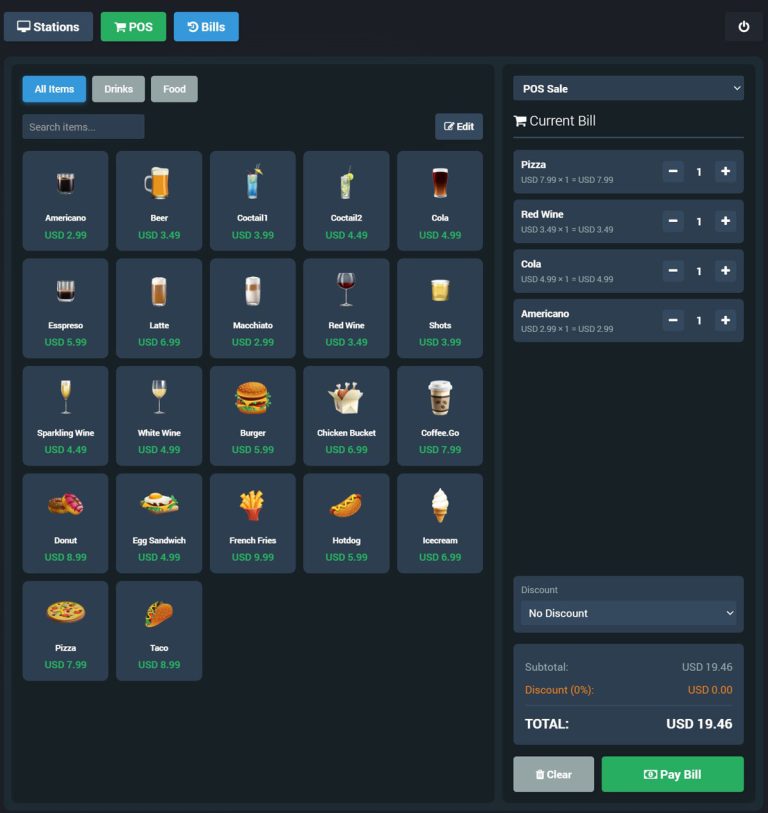
POS turns any Cloud Station device into a simple touchscreen cash register for quick in-venue sales (bar, café, snack corner, game room).
Staff browse items by category (All Items / Drinks / Food), search the catalog, tap products to add them to the current bill, and adjust quantities instantly from the cart.
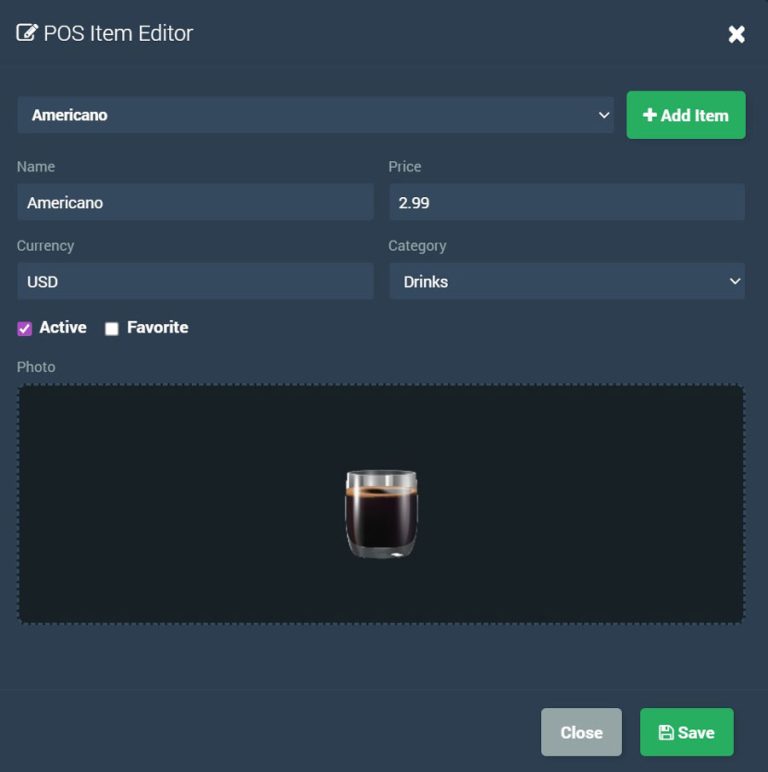
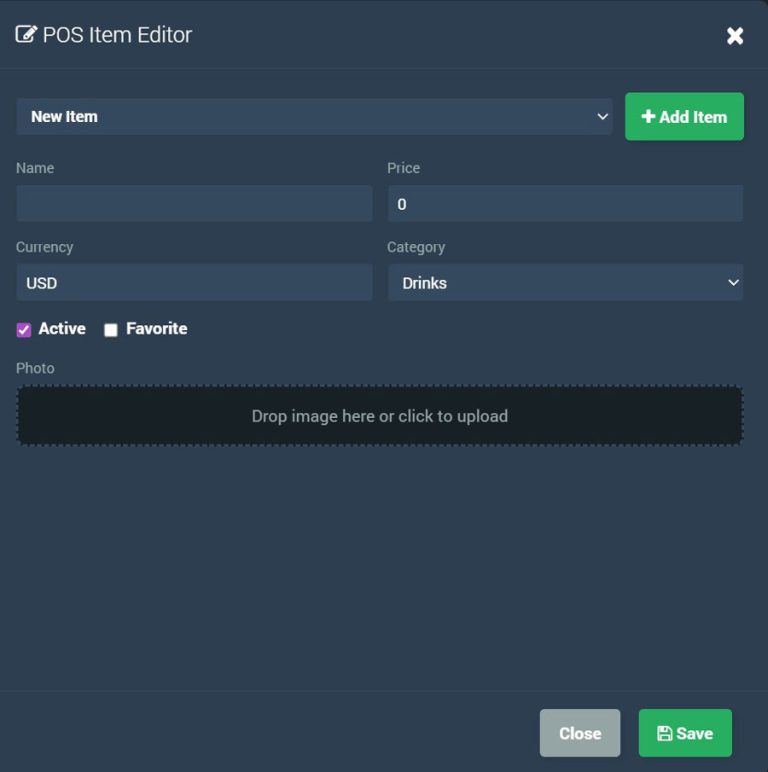
Use POS Item Editor to manage your product list: set item name, price, currency, and category, mark items as Active and optionally Favorite, and upload a product photo for a cleaner kiosk-style menu.
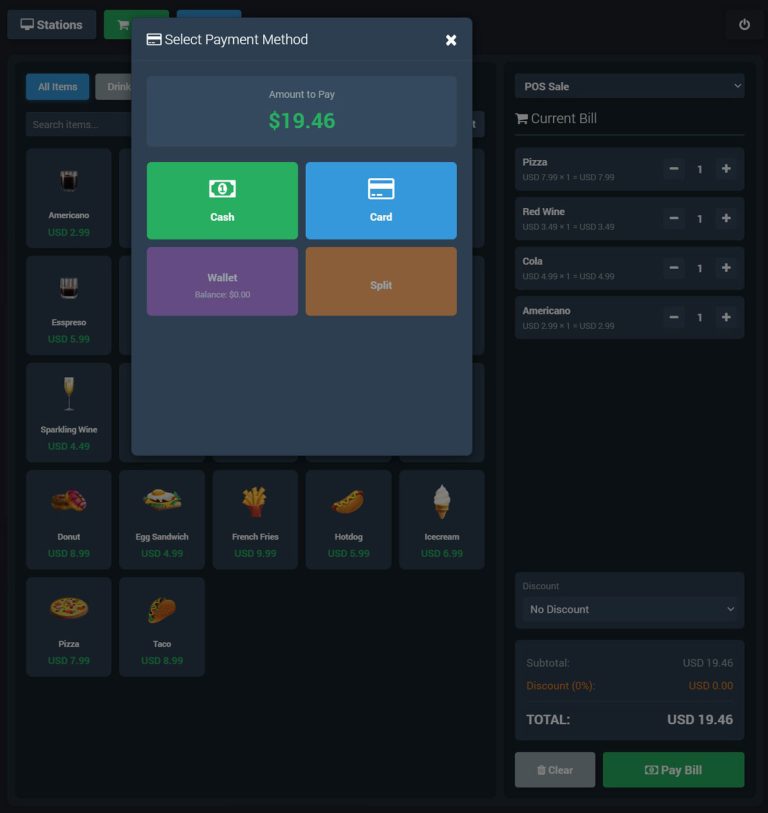
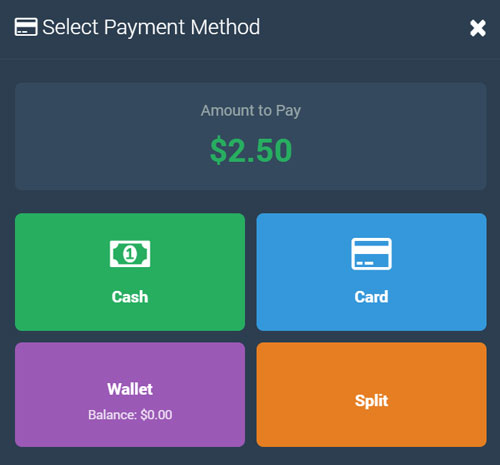
When the order is ready, the checkout screen shows the total and lets you choose the payment method (e.g., Cash, Card, Wallet, or Split) before issuing a receipt.
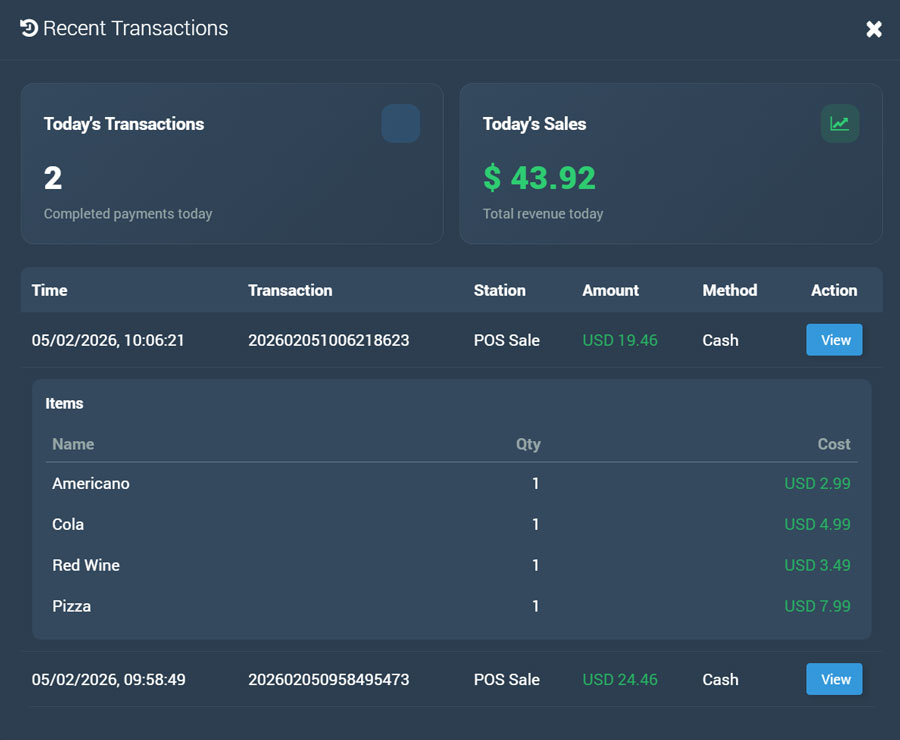
Bills is the transaction history and cash-out view for POS activity, so you can track what happened today without exporting reports. It summarizes Today’s Transactions and Today’s Sales, and lists each payment with time, transaction ID, station, amount, and method for fast auditing.
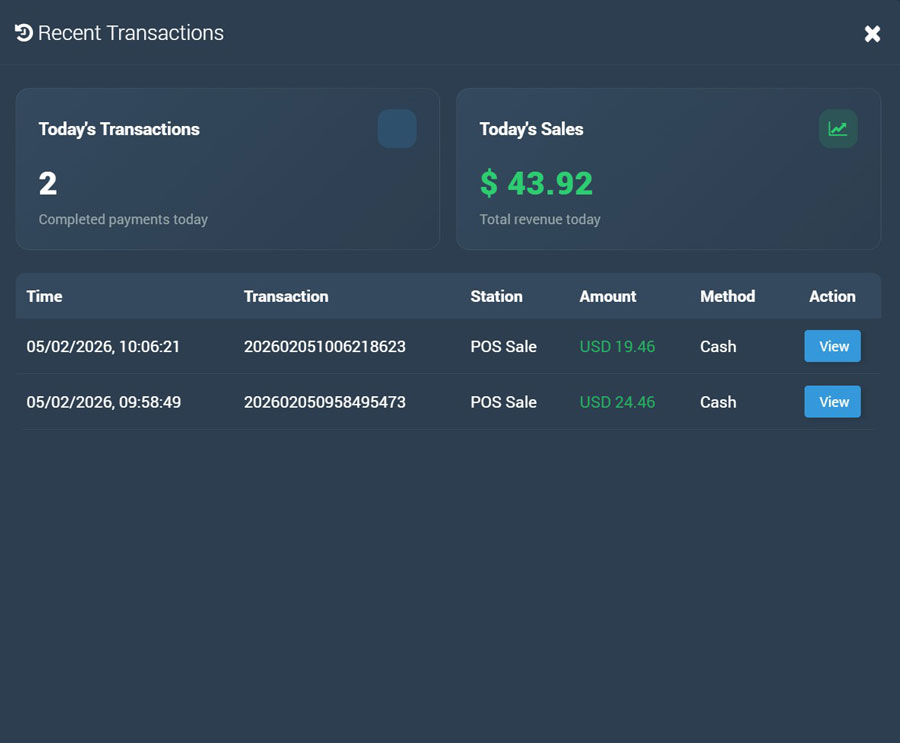
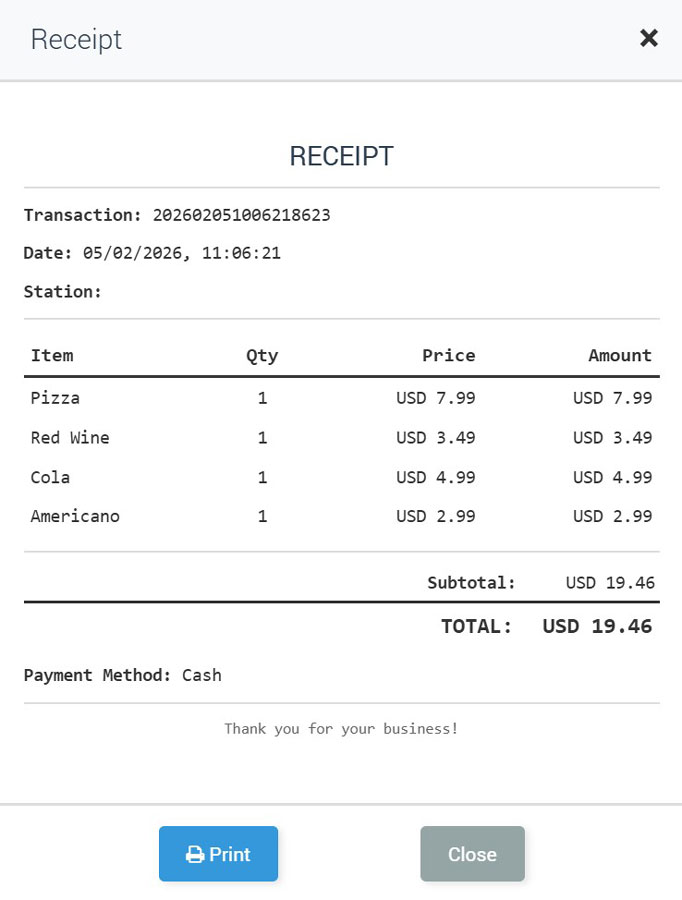
From the Recent Transactions list you can open a transaction (View) to display the full receipt, including date/time, itemized lines, subtotal/total, and the selected payment method, with an optional Print action.
This makes it easy to verify sales on the spot and reconcile staff shifts or front-desk cash handling.
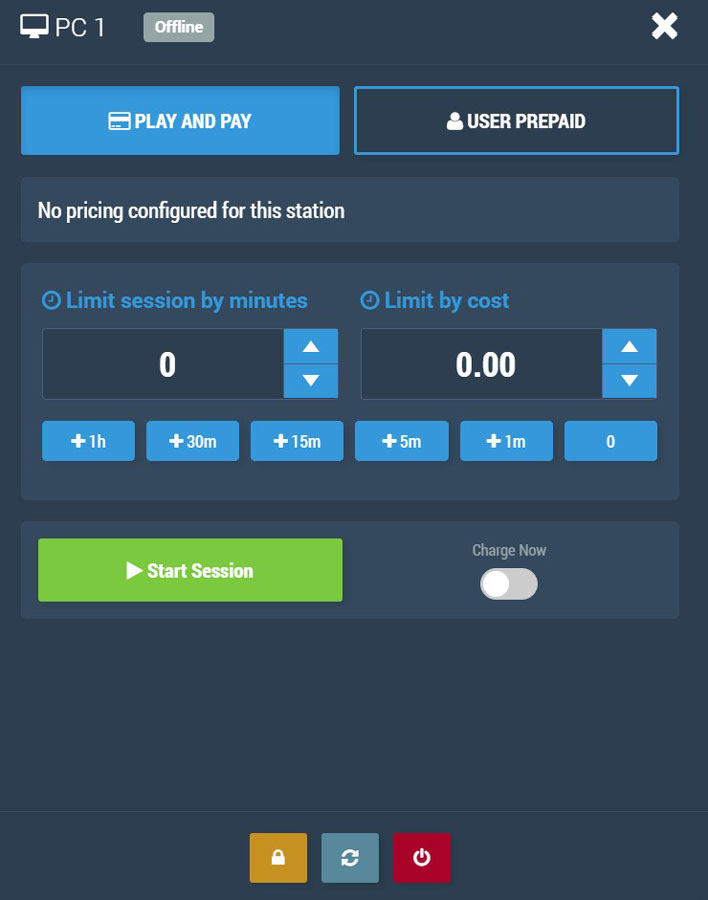
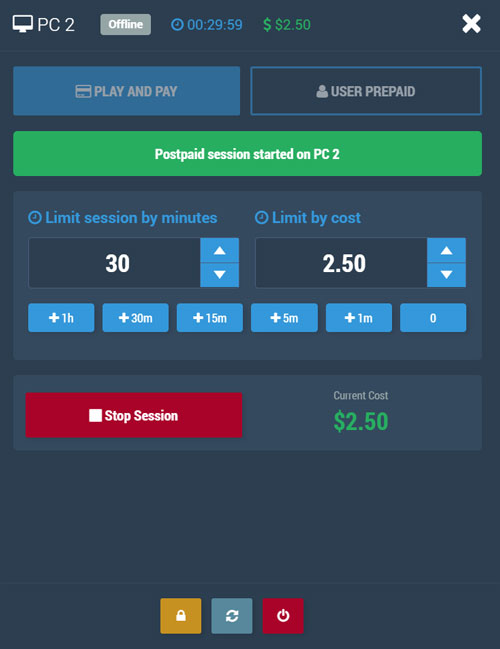
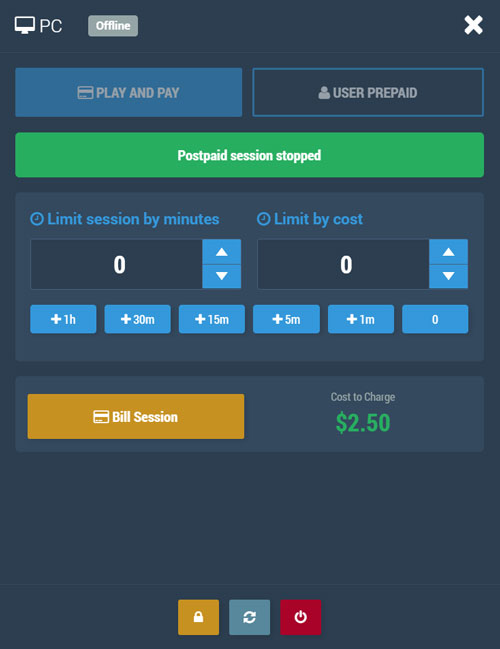
Open a station from the Dashboard (for example PC 2) and choose whether you want Play and Pay for postpaid charging or User Prepaid for prepaid users.
Play and Pay

Set the session limit by minutes and/or cost, adjust it with the quick time buttons, and start the session.
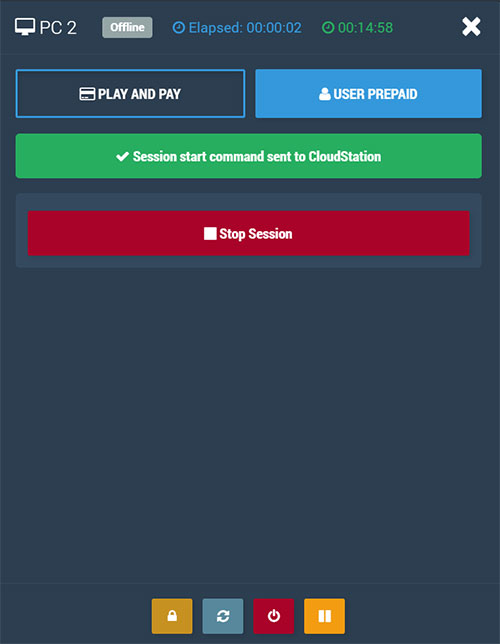
While the session is running, Cloud Station shows the remaining time and the current cost, and you can stop it at any moment.
After stopping, click Bill Session to convert the usage into a billable item, then open POS, select the same station, review the item in Current Bill, and click Pay Bill.

Pick a payment method such as Cash, Card, Wallet, or Split, and the system generates a receipt with transaction details and totals that you can print.

User Prepaid
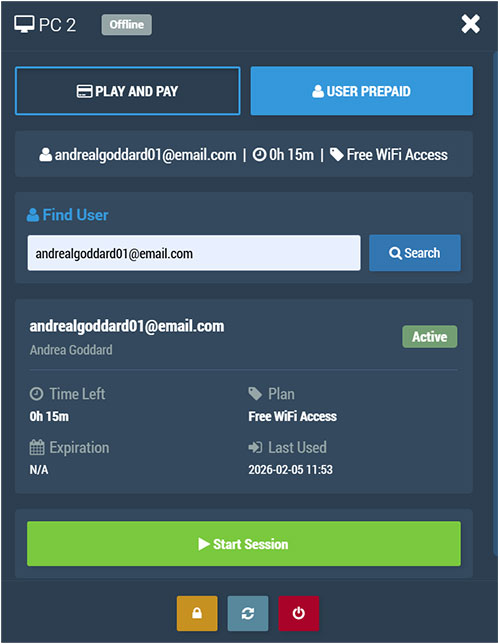
User Prepaid lets staff start a station session using an existing customer account with prepaid time or a predefined plan, and Cloud WiFi user accounts can be used here as well.
You search and select the user by email (username), then review key details such as remaining time, plan name, expiration, and last used date before starting.
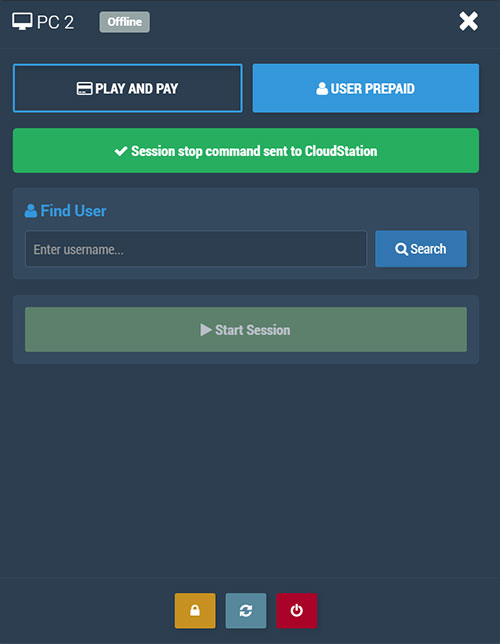
When you click Start Session, Cloud Station sends the start command to the selected PC and begins tracking the prepaid time automatically.
When the session ends, clicking Stop Session sends the stop command and returns the station to idle, ready for the next prepaid user.