Manually assigning IP addresses without a DHCP server can create havoc on your client network.
Antamedia Hotspot comes with a built-in free OpenDHCP server, which can be used to assign dynamic IP addresses to client devices on the client network.
Before you can start using it, proper IP settings have to be configured.
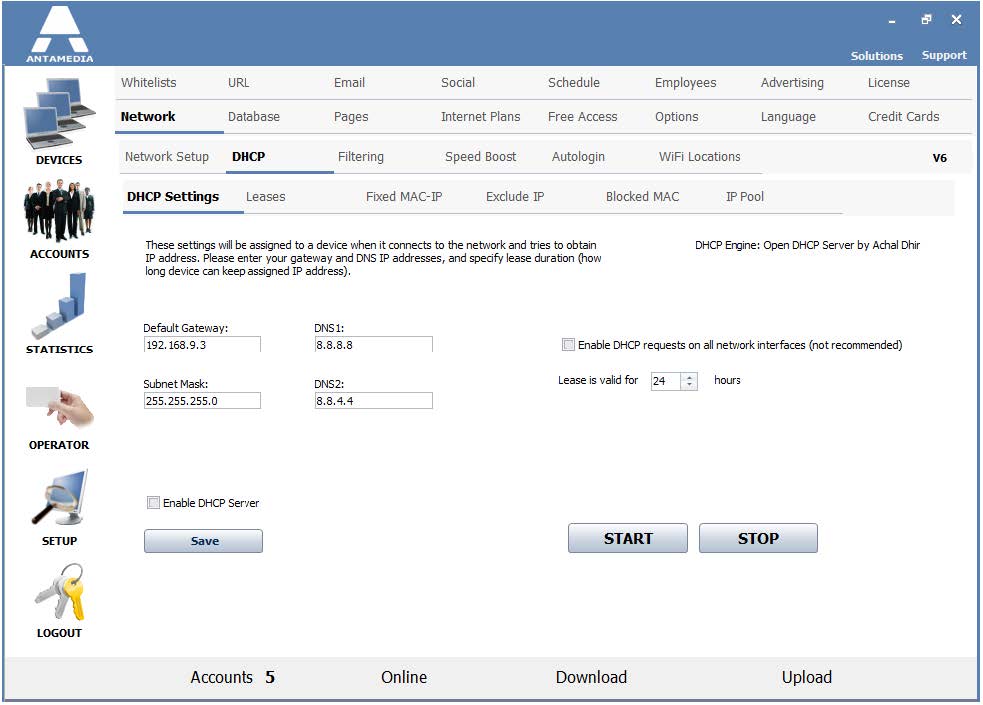
Please go to Hotspot Setup – Network – DHCP page and open the DHCP Settings tab.
Following settings need to be configured:
Default Gateway – As Default Gateway address enter IP address of NIC2 (LAN) adapter in this field.
Subnet Mask – Value in this field has to match the value set in the IP properties of the NIC2 (LAN) adapter.
DNS1, DNS2 – It is recommended to use DNS addresses of your ISP or public DNS servers such as Google’s (8.8.8.8, 8.8.4.4).
The lease is valid for_hours – This option determines how long client devices can keep assigned IP address. It is recommended to set a value of 8 hours for wireless networks.
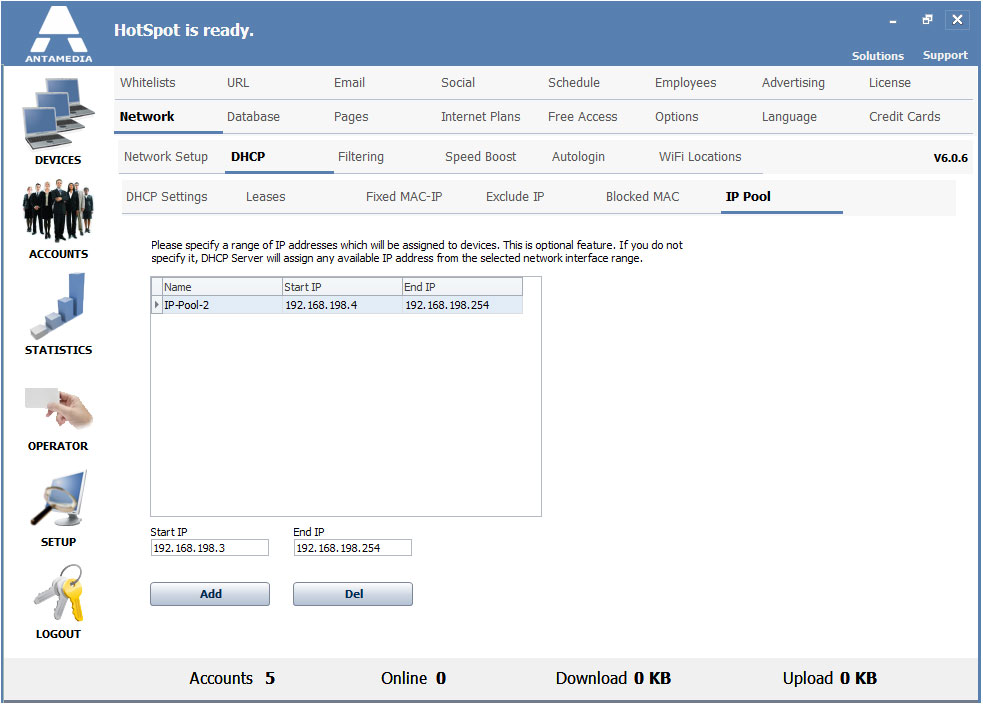
A pool of available addresses is automatically created based on IP settings of NIC2(LAN) adapter. If you need to add a new pool or modify existing, it can be done on the page under the IP Pool tab.
After you configure these settings, go back to the DHCP Settings tab, check Enable DHCP server and click the Save button.
Restart Hotspot and DHCP will start automatically with it.
Please note, you can use only one DHCP server in the local network.
Additional DHCP servers will make a conflict.
If OpenDHCP server from HotSpot is not suitable, you can always set and configure some other DHCP server.